The essence of the goal “Conversion” in targeted advertising on Facebook
Before launching an advertising campaign on Facebook, an important task appears – to choose the right goal. The optimization strategy and the outcome of the campaign as a whole will depend on this parameter. Facebook itself uses user data and behavioral factors to determine which of them should receive priority in viewing your ads. These will be those netizens who are most likely to take the action that is laid down in the goal of the advertising campaign.
There are three types of goals available at the selection stage:
- recognizability;
- leads;
- conversions.
![]()
The essence of the goal is simple – to sell the product or service that we are advertising. Facebook offers us three options for conversion advertising campaigns:
- Conversions. Allows us to optimize ads for selling or performing an action on the site. To implement, you need Facebook Pixel settings, which will be discussed in more detail below.
- Selling products from catalogs. Before setting up, you need to create a catalog. You can develop it manually or upload a ready-made feed. This will help you advertise the products featured on your site.
- POS visits. These campaigns are relevant for businesses with offline POS. It is necessary to register the company’s point in the page structure on Facebook. By registering your location, ads will target users in the vicinity.
Directory creation and point registration can be done using the Business Manager in the Resource section.
Optimization for conversions is recommended if you receive at least 50 orders per week. All of these orders must be linked to Facebook ads. Extraneous conversions will not be counted. Accordingly, assuming the cost of conversion is $ 1–2, you spend $ 50–100 on advertising every week.
The advantage is that the “Conversion” goal allows you to immediately determine the cost and number of applications. If your budget does not allow you to use the required amounts for a goal, do not customize it. Facebook won’t get enough data for quality optimization. In this case, bring better traffic to your site first.

Choosing a target audience
The success of an advertising campaign depends not only on the choice of the target, but also on the setting of the target audience. Facebook allows you to make detailed settings for the following strategies:
- Detailed targeting.
Think over a detailed portrait of your target audience:
- age and gender;
- type of activity (work, study);
- average monthly income;
- presence of a husband / wife, availability children;
- geographic data;
- detailed interests (for example, visiting beauty salons or home improvement).
- Custom audiences from the site. When you reach enough traffic on your site using the Facebook Pixel, you can set up audience remarketing for your campaigns.
- Use targeting extension in combination with granular targeting to show ads to users who are outside the audience you configured, but match your target audience by the main criteria.
Via Facebook Pixel we have two types of settings conversions:
- Page visits.
- Events.
A visit to a page means a user gets to specific pages of the site related to the conversion. For example, after placing an order or purchase, the user automatically views the “Thank you” page.
If the “Thank you” page is missing, conversions are set to events. An event is considered to be a click on the Buy or Order buttons.
Installing Facebook Pixel
- First, you need to go to the Advertising Cabinet.
- From the Ads tab Manager go to Pixels.
- Click on + Add New Data Source and select Facebook Pixel.
- Next, according to the instructions, choose a convenient installation method:
- via the Google container Tag Manager;
- manually;
- with the help of the site developers.
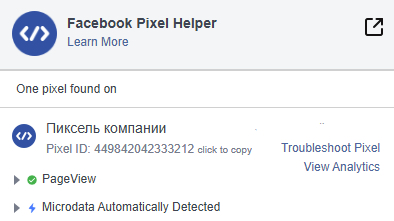
- Install the Facebook Pixel Helper browser extension. It can be used to check if the installed Facebook Pixel is working on the site.
Setting up conversion on page visits
To set up conversions of page visits, you need perform the following actions:
- Go to the ad account again and from the Ads Manager tab go to “All tools” and “Custom conversions”.
- Click on “Create Conversion”.
- Configuring the URL from which we will collect users.
You need to click on the “All traffic for URL” field. It’s at the top of the form. Add the address of the page on which the user performs the target action (purchase, order). Using the rule, add the page address: “URL =” page title “”.
Next, through the drop-down list, select the classification of the page and the action that the user takes on it. After completing the settings – “Create”. The conversion will be saved and will be displayed in the “Customized conversions” section.
The conversion will be activated as soon as site users visit the page we need, and Facebook will thus start collecting statistics .
Setting up conversion for an event
- To track a click on the buttons responsible for the conversion, go to the site and find this button (for example , “Register” or “Buy”).
- Right-click on the site button and select “View Code”.
- A console with the page code will open on the screen. Find the button code (it should be highlighted immediately) and right-click on it. Click on “Copy” – “Copy Selector”. Save the copied code in a notepad.1
- Create a trigger using Google Tag Manager. Press “Create” – type “Click” – “All elements”. A form will appear in which we select “Some clicks” as an activation condition, and as an event we mark “Click Element” – “Matches the CSS selector”. In place of the selector, add the previously copied code and save the trigger.2
- Next, create the Tag. You need to come up with a name, in the “Tag configuration” form, specify “Custom HTML”, and select the one you just created as the activation trigger.
- Specify the Facebook Pixel in the tag. Before that, we change the pixel code so that it distinguishes the event that will occur on the site. This code is located in Ads Manager – “Pixels” – “Configure” – “Set pixel” – “Set the pixel code yourself.” Copy this code into notepad.
- Add an event to the pixel code (for example, sending an order). A complete list of event codes is in the Facebook instructions. Copy the required code.
- Open the notebook with the pixel code and add the copied event code.
- Go back to Google Tag Manager, open the HTML block and copy the modified pixel code into it. Among the additional settings, select “Once per page.”
- Check the tag in the “View” mode and publish the changes. Thus, we have configured the transmission of the event to the Facebook advertising cabinet using Google Tag Manager.
- We go to the already familiar section of the Facebook advertising cabinet – “Customized conversions”. We create a conversion. A form appears in which we select the appropriate event on the site, add a rule where we indicate the site address and name the conversion. After a while, the conversion will also appear on the list.
Considering all of the above factors, you need to think carefully about your decision before choosing the goals of your Facebook advertising campaigns. If users are making the recommended number of conversions within a certain period, and the budget allows you to use this type of advertising goal, be sure to do it.
After all, Facebook will use automated algorithms to improve sales results. If you are ready for this type of campaign, we recommend developing a strategy for attracting more targeted visitors to the site, based on the available budget.
You can always contact us and use the campaign management service in targeted advertising, or get a free consultation from AG Marketing specialists on issues that interest you.